Start automating your email marketing
ActiveCampaign is an excellent tool for creating email campaigns through an automated workflow using your contacts database. ActiveCampaign is one of our preferred tools when it comes to marketing campaigns since its interface is fast and intuitive. Do you want to know how to create an automation that allows you to start generating leads automatically? Let’s go for it!
To get started you need to have an account created in ActiveCampaign. If you don’t have one yet, you can create one for free that will give you access to its trial version.
Step 1
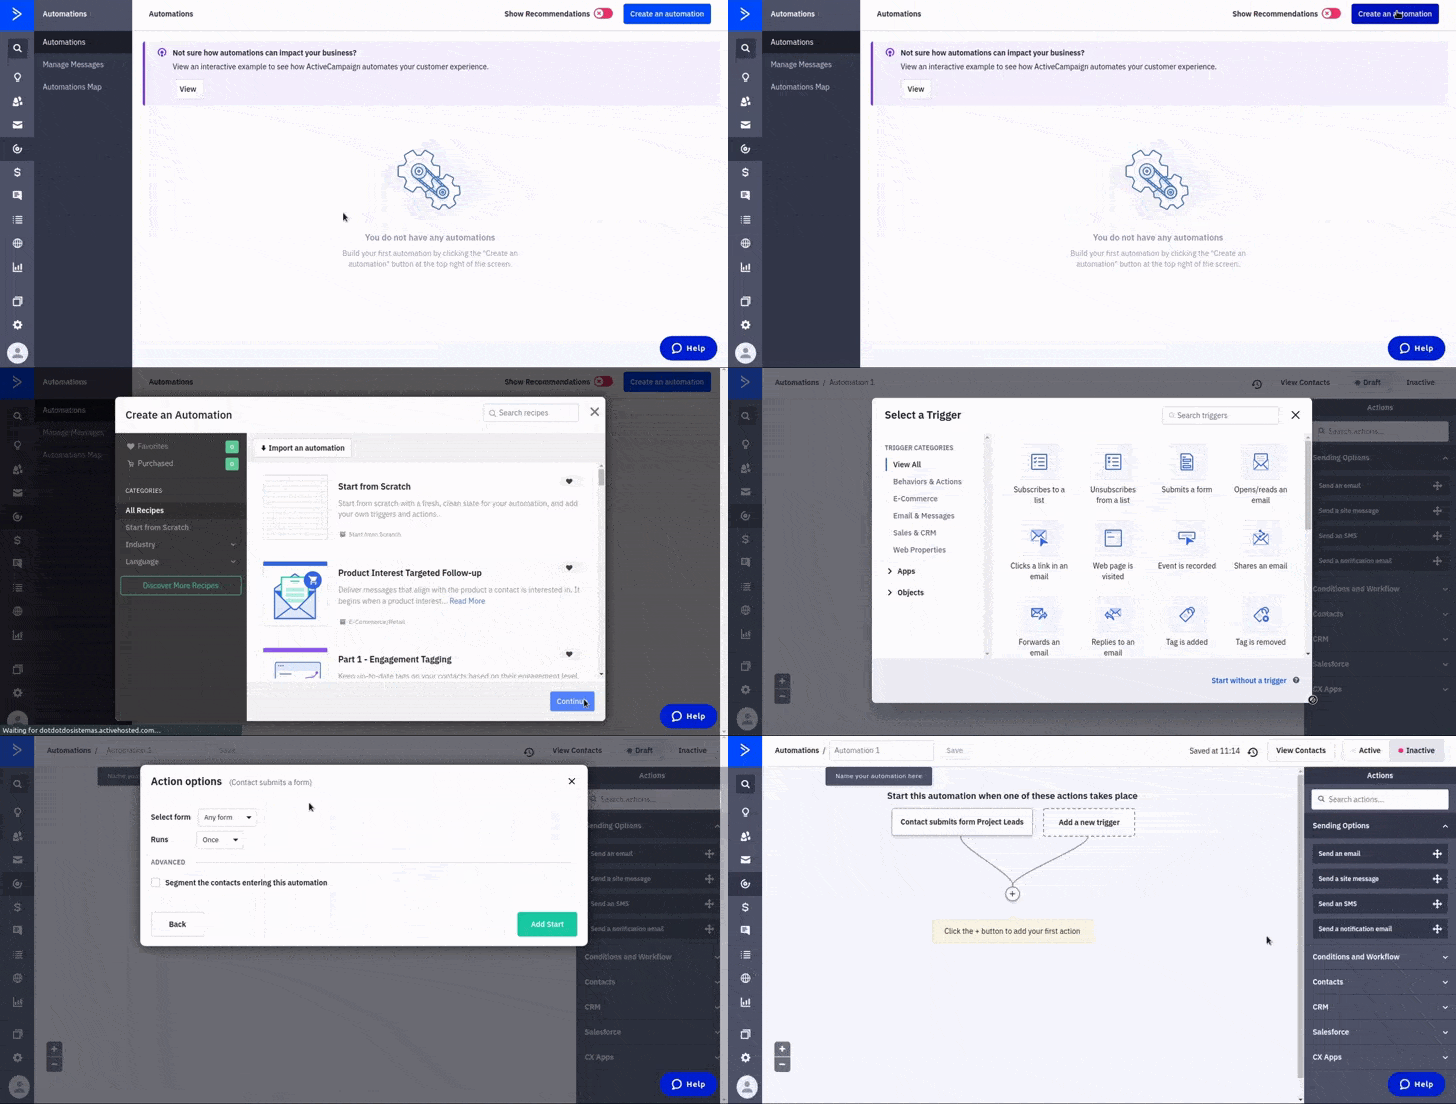
1.- Click the “automation” tab on the left menu.
2.- Click the “create an automation” button at the top right corner of your screen.
3.- You can choose a “recipe” from some presets that ActiveCampaign has built for you. For this tutorial we will create an automation from scratch so we will select the “Start from Scratch” option. Then click “Continue”.
You can select a trigger to start the automation. For this tutorial, we will simulate that we have a form created at ActiveCampaign active on our site for the purpose of capturing data of some potential leads for a special offer in an “x” product.
4.- We will select the “submits a form” trigger.
5.-Select the form that you want to use for this trigger. If you don’t have any forms yet, you can create them by clicking on the site tab from the main left menu. In this tutorial, we will use a form named “project leads”.
6.- You can select how many times this automation will run by selecting the run options. For this tutorial, we will select the “run once” so the automation won’t be repeating over and over for the users.
7.-To finish the trigger configuration click “add start”.
Step 2
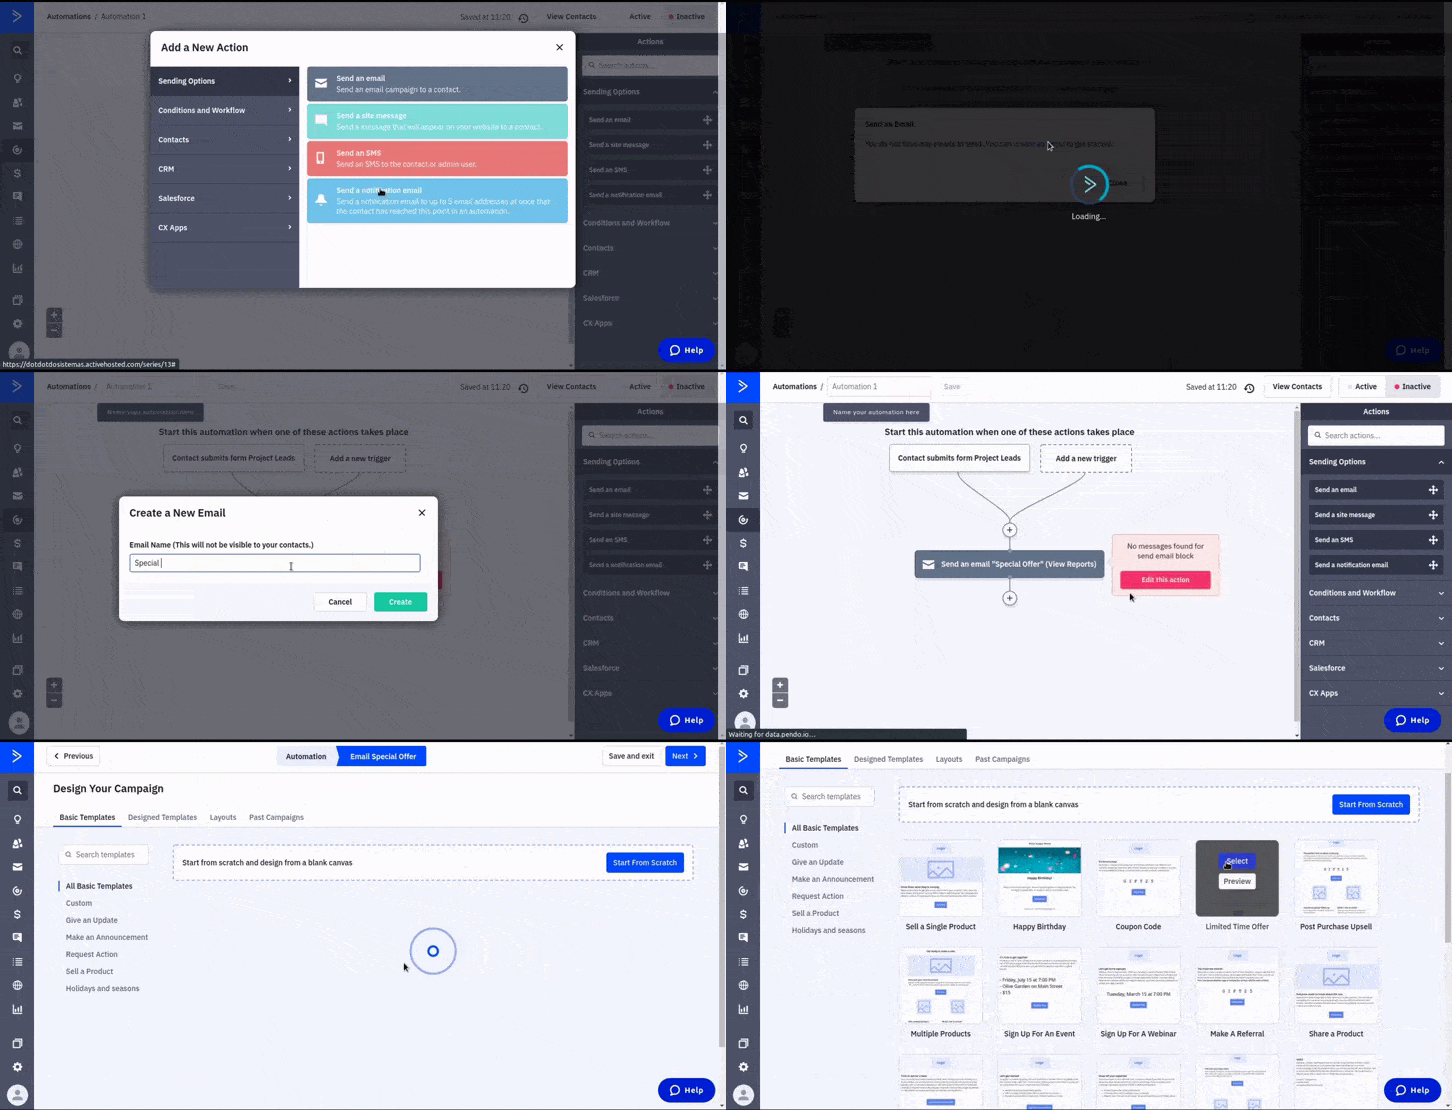
1.-It will ask you to add a new action. You can select from different categories. In this case, we will select the “Send an email” one.
2.-Since we don’t have any emails yet so will need to create an email. Click the “create an email” link
3.-Type a name for the email. This won’t show for the recipients, is only for your records. Click “create”.
4.- Then you will be redirected to the templates menu, where you can select some premade templates or create one from scratch. In this case, we will use the “limited time offer” one.
5.- You can change the sender details and change the sender information and subject from your email. Click “Continue”.
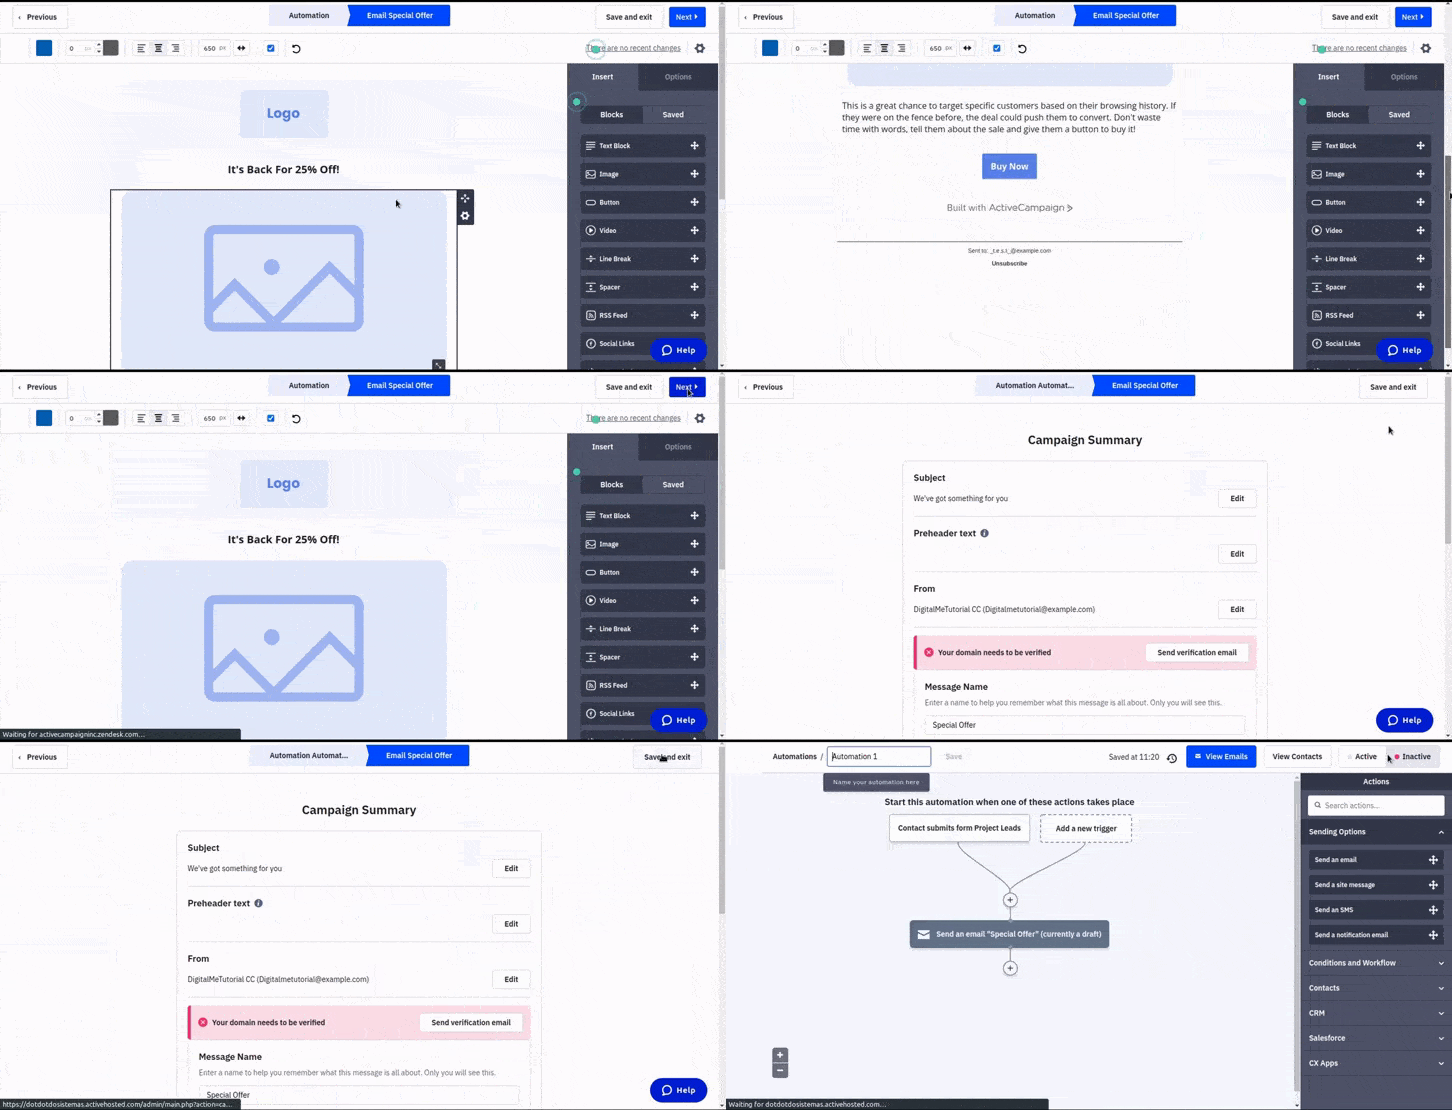
6.- You can customize the template by using the drag and drop builder, you can add blocks or change the text lines.
7.- In the next step, you can review your campaign summary. Also, you can enable tracking for it. In this case, we will enable “link tracking”. Save your email and it should be ready to send.
STEP 3
1.- We will add a “wait” conditional, so the action will have to wait 2 days before sending the email when the user has had some time to think about what was offered in our form.
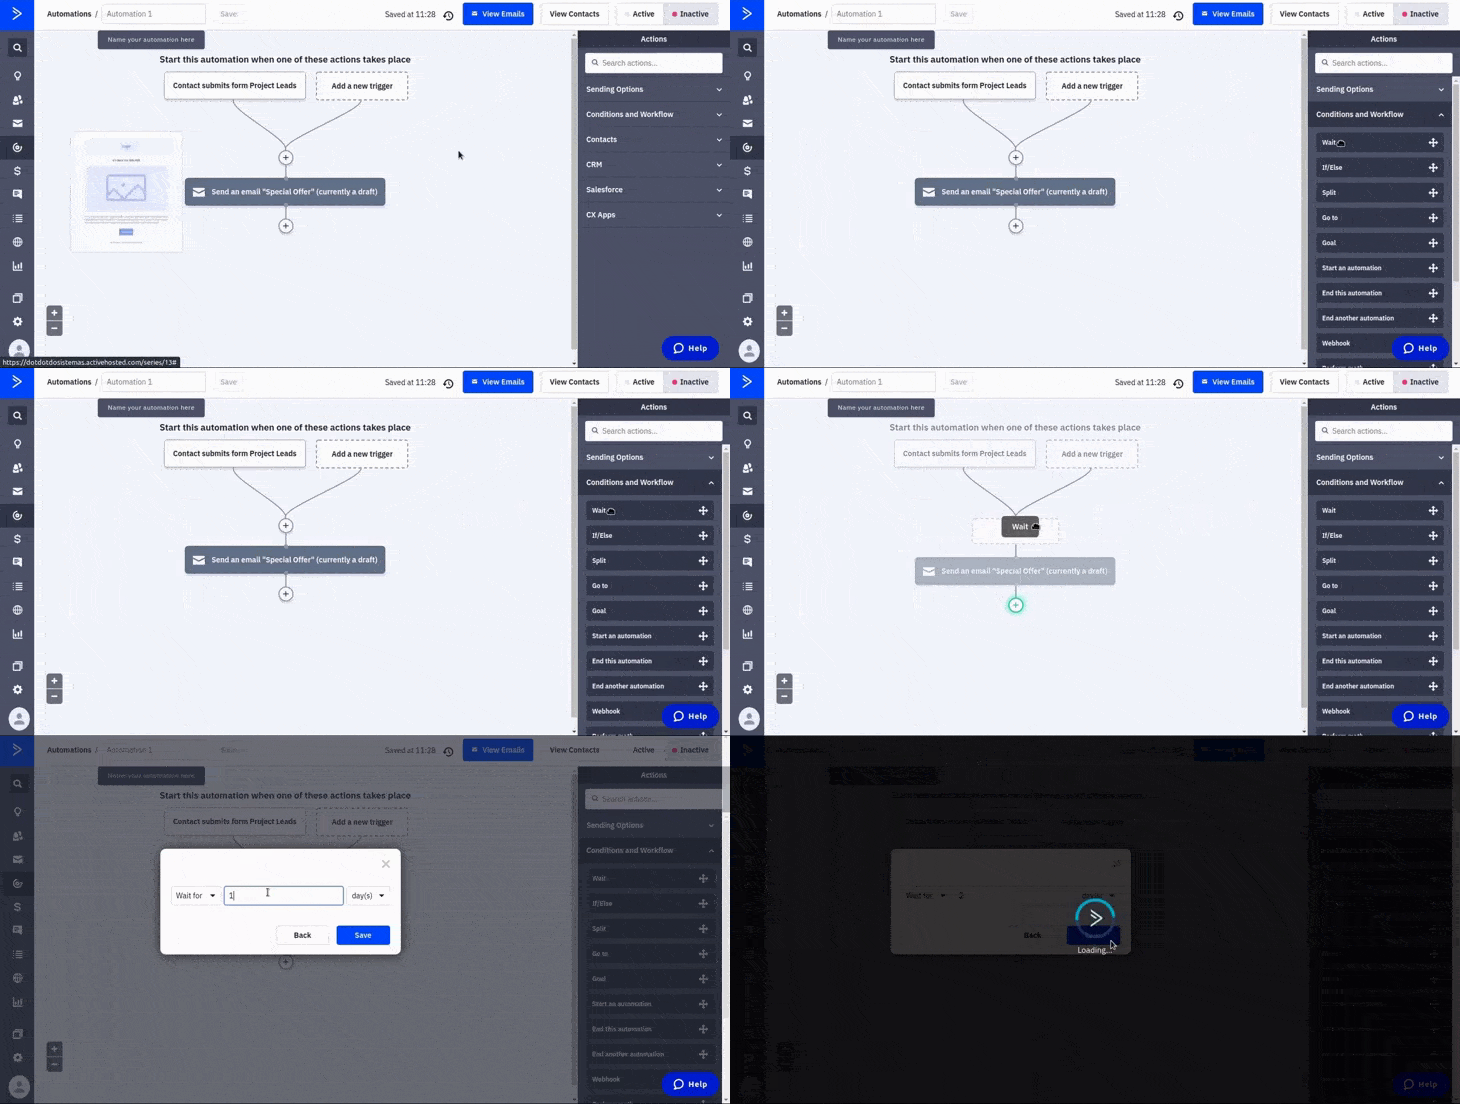
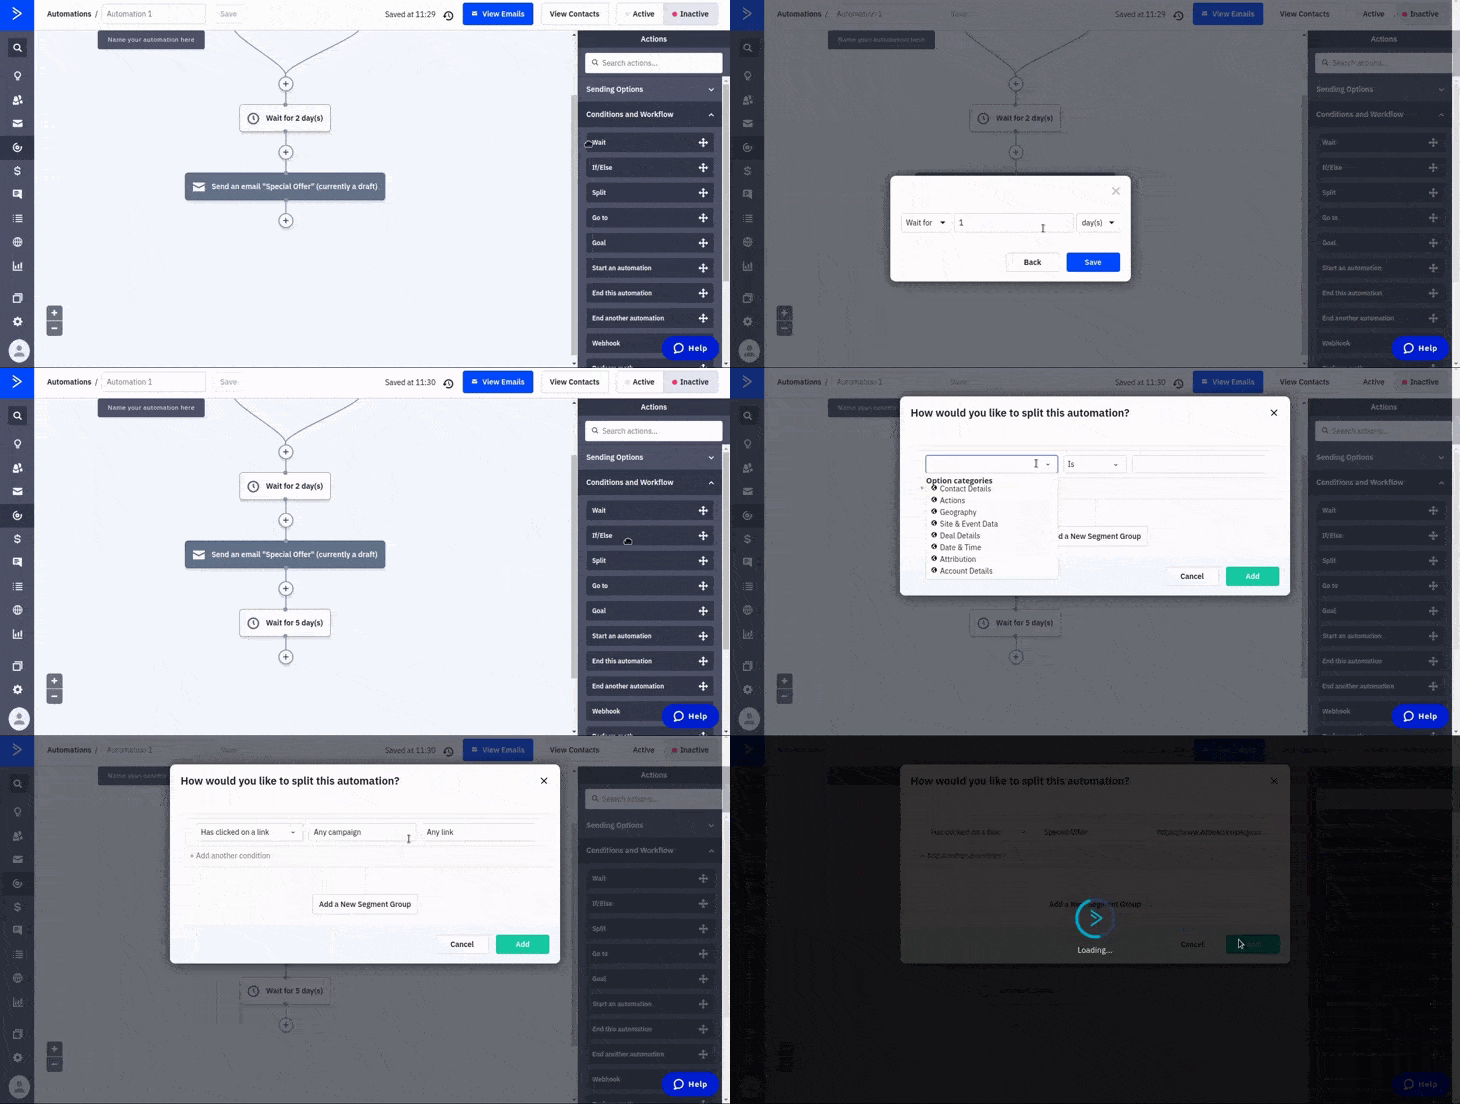
2.- Then we will give the user up to 5 days to open the link that was placed in our email. So we will add another “wait” condition by dragging the wait block and placing it after the “send an email” action.
3.- We will add an “if/else” condition by dragging and dropping the block after the wait box. We will select “action” in option categories, “Has clicked on a link” as the condition, “special offer campaign” as the name of the campaign, and we will select our special “link” that was put inside our email we just created. Click “Add”.
STEP 4
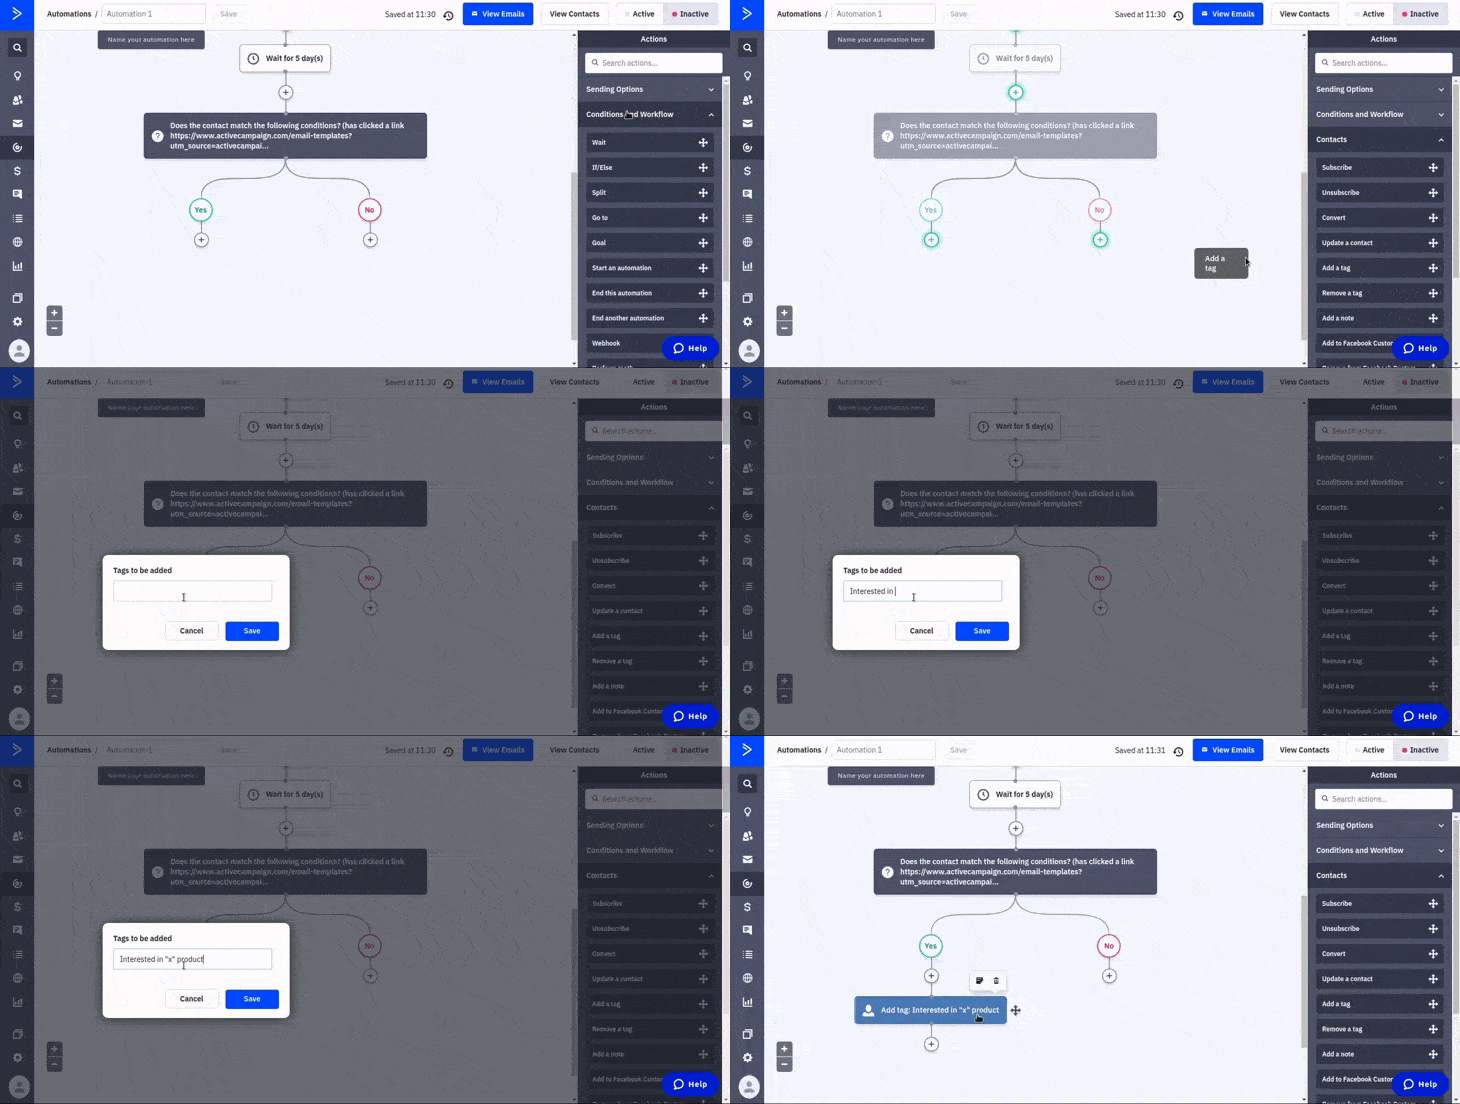
1.- A split will appear with a “yes” and a “no” conditions. For the purpose of this tutorial we want that when our users click on the link of our email, we will give those users a special tag to have a record of those who are interested in our special offer. So we will drag an “add a tag” action to the workflow. We created a tag “users interested in “x” product”.
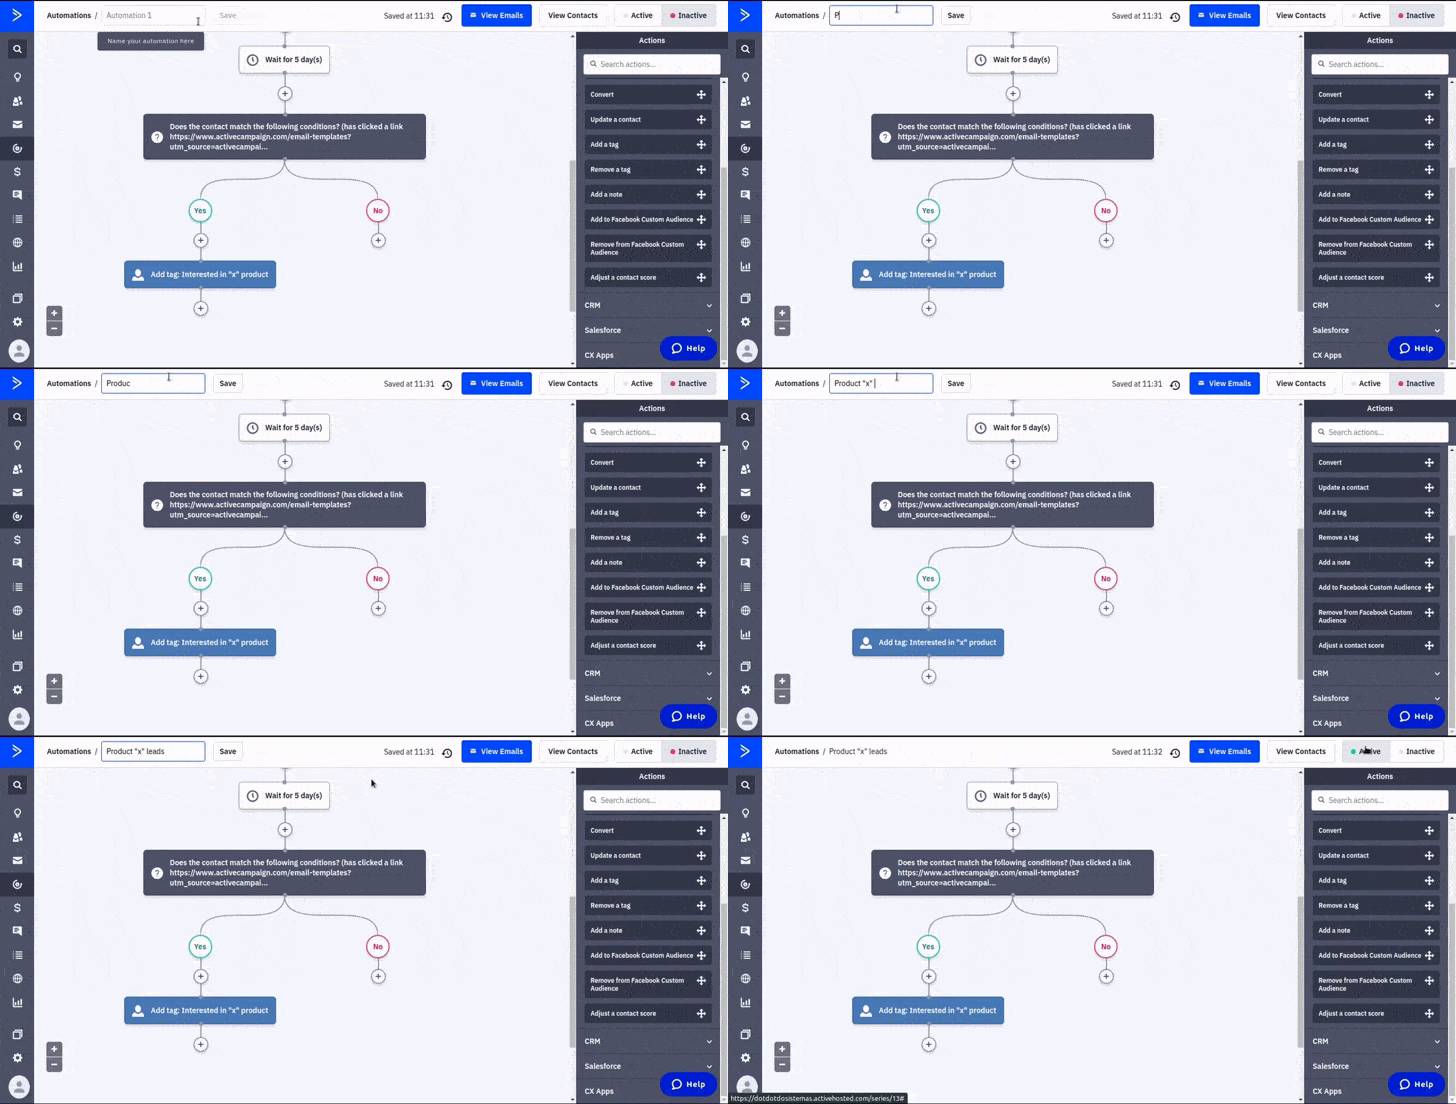
19.- You may want to change the name for your automation. Don’t forget to set your automation as “active” so it will start running.
Thats’ it. That’s how easy it is to add new automation for your email marketing. You can create the super customized automation that you need in order to make your email marketing campaigns successful. Remember that if you have any doubts or issues related to your ActiveCampaign automation, we offer our ActiveCampaign managed service that is handled by our team of experts. It includes 24/7 Support, fully automated email sequences, customized branded emails, and custom API syncs. Don’t hesitate to contact us if you are interested so we can arrange a call.

 IN VALENCIA AND SAN DIEGO