Lists and Tags on ActiveCamapign
Lists and tags are two of the most basic features within ActiveCampaign, as they allow you to segment your lists according to characteristics that your contacts have in common. Creating lists and adding tags will make your automations more personalized. Therefore your campaigns will be more effective.
What is a list in ActiveCampaign?
Lists within ActiveCampaign are the first layer of segmentation over your overall contact database. In other words, a list is the broadest and most general segmentation of your contact database. ActiveCampaign recommends 2 categories for creating your lists: Prospects and Customers. The first is for those leads who have the potential to buy your products/services. The second is for those who have already acquired your products/services. It is recommended your lists be as general as possible since ActiveCampaign allows you to deeper segmentation by using tags.
What are tags in ActiveCampaign?
The tags within ActiveCampaign allow you to segment your contact lists at a deeper level, according to their characteristics or behaviors. Although you can add many tags to your contacts within ActiveCampaign, it is recommended to use only the necessary ones to make your campaigns more effective. You can create tags that apply to common behaviors or status of your contacts: Engagement, products they have bought, if they visit certain pages on your pages, etc.
Having both a simple contact list and simple tags well applied to your contacts will allow you to have a well-organized database, which will allow you to have better results with your campaigns since the information that your contacts receive will be more direct.
Are you interested in learning how you can create lists and add tags to your contacts in ActiveCampaign? In this tutorial, we are going to show you how.
How to add lists and tags
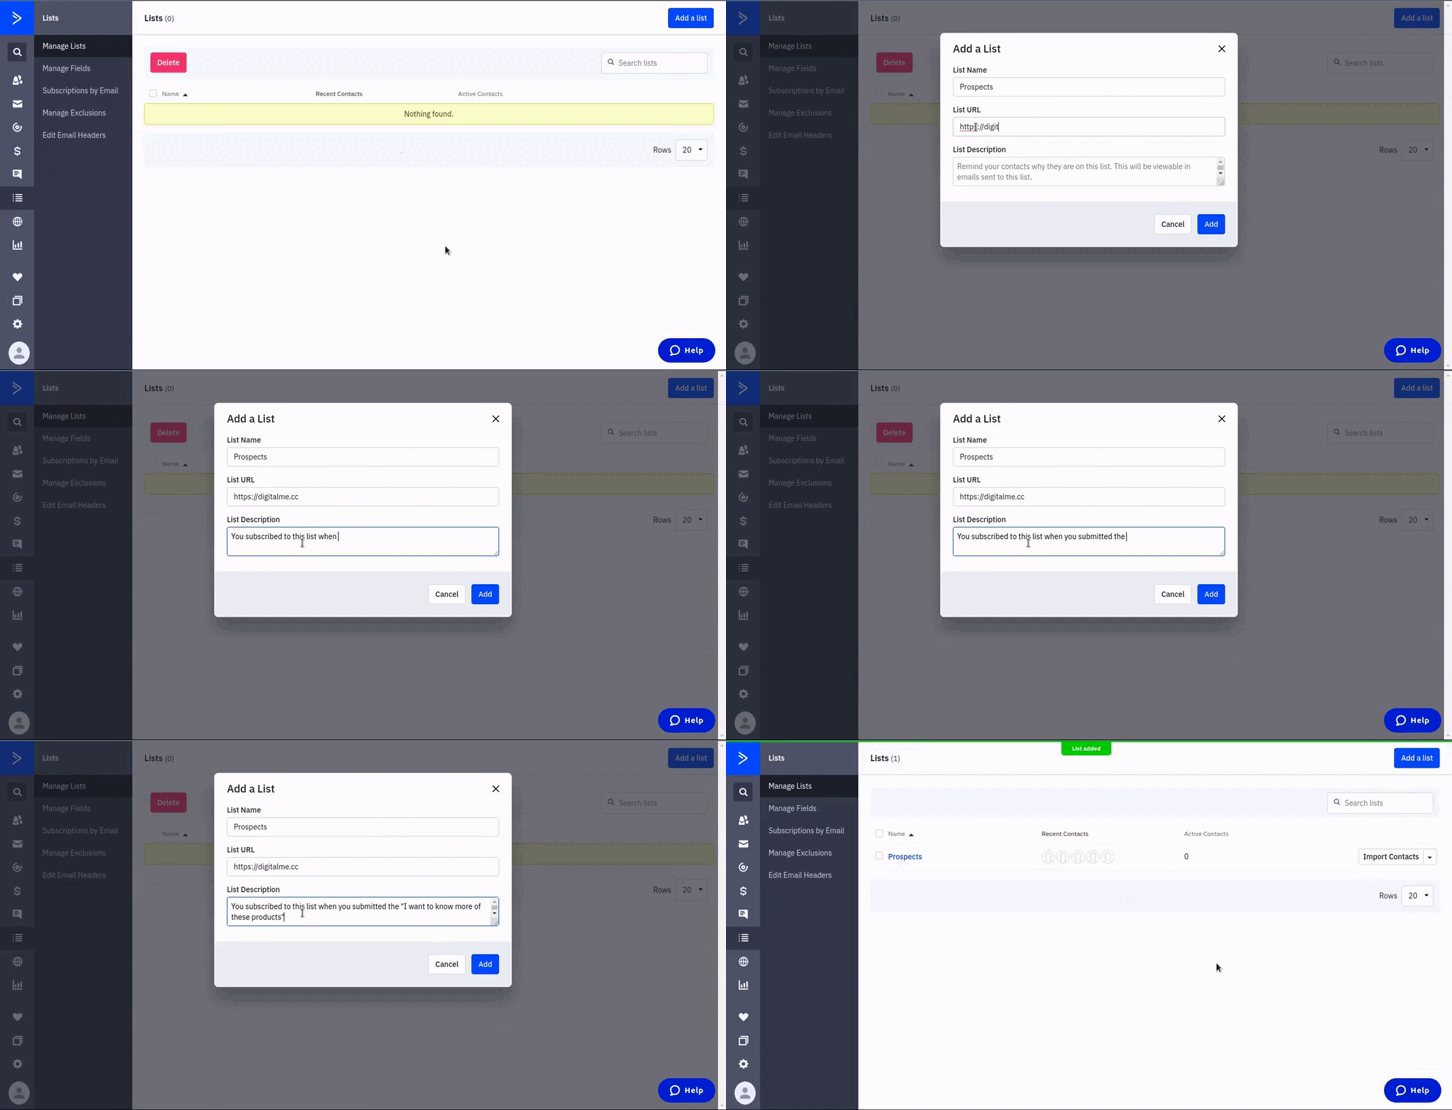
1.- Go to your ActiveCampaign main dashboard and click on the “Lists” tab. Click the “Add a List” button. Fill in the Name, URL, and Description fields. Click “Add” to add the list.
2.- Your list will be created and it’ll be empty.
Import your contacts
You can either import your contacts if already have contact lists created, or you can add contacts manually by opening the list. First, we are going to import a list of contacts from a file, and we’re going to add a tag to specify where that list is coming from.
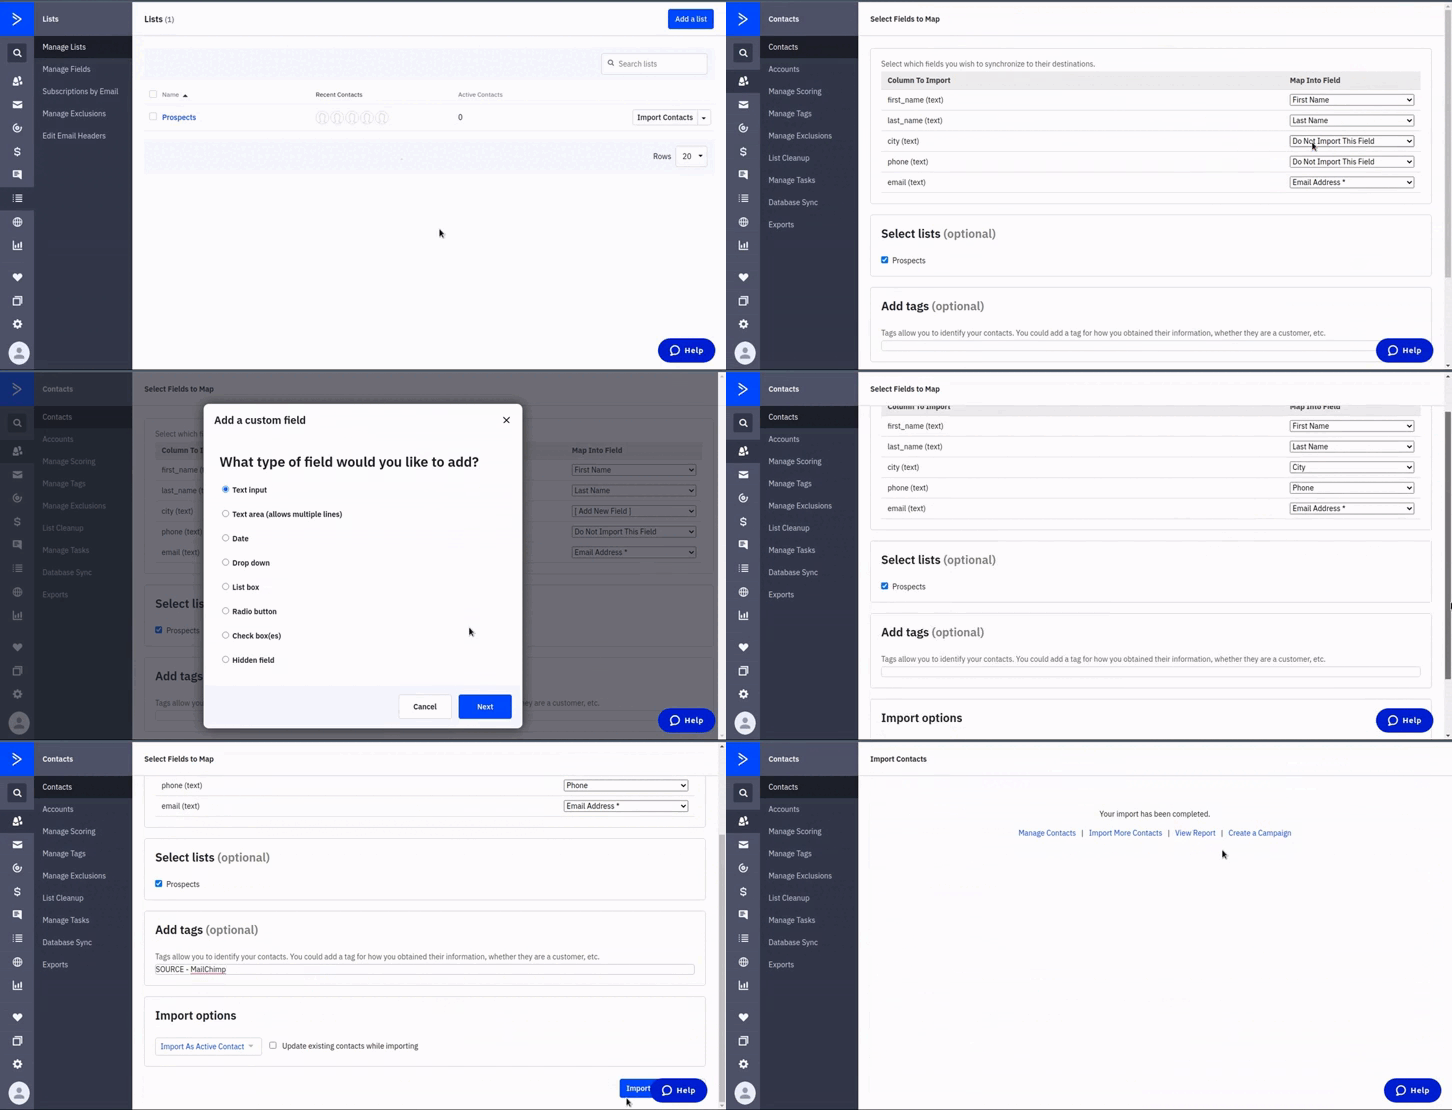
1.- To import a list of contacts click on the “Import Contacts” button.
2.- Click “Import from file”.
3.- Select the file you want to import your contacts from. The file must be formatted correctly according to ActiveCamapign requirements.
4.- Once the file has been uploaded, you need to map the fields so they match ActiveCampaign’s fields. You can add custom fields if necessary.
5.- You can also add tags in bulk to all the contacts in the list. For this example, we’re going to add a SOURCE tag, so we specify where the contacts are coming from. You can add whichever tag applies to your list.
8.-When your list is ready to be imported, click on the “Import Now” button. Your contact list import will start. It may take some minutes depending on the length of your list. You’ll see a success message once the import is finished.
Add Contacts Manually
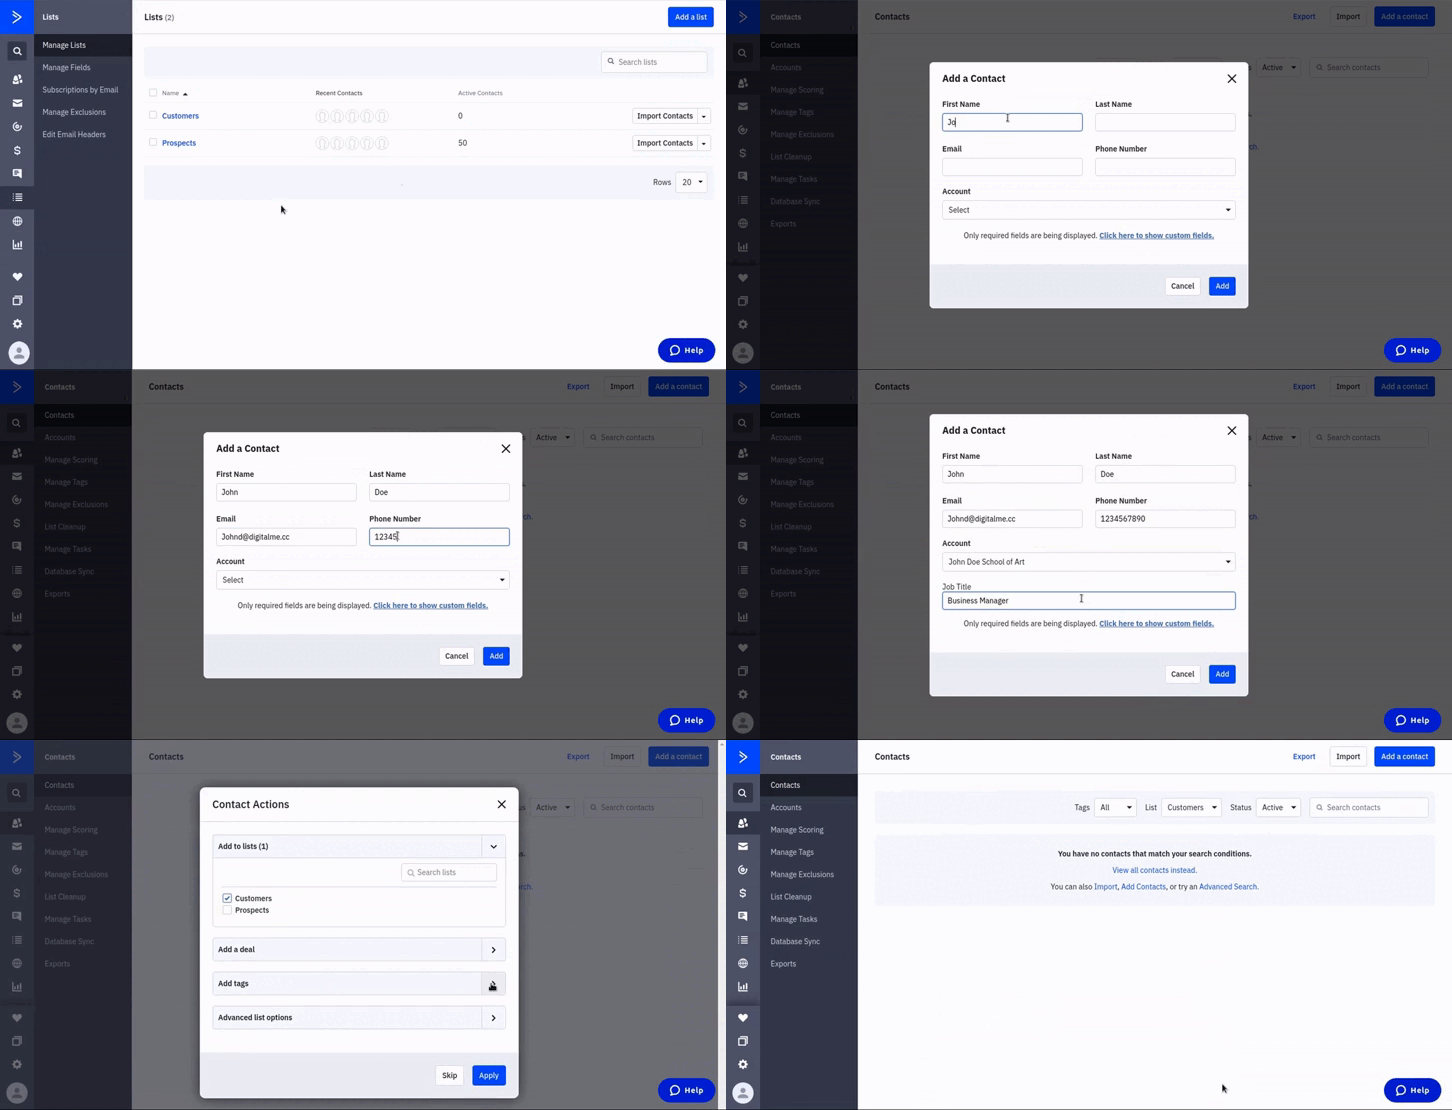
Now we are going to add a contact manually. To do this you need to open the list where you want to add the contact.
1.- Click on the “Add a contact” button.
2.- Fill in the proper fields that apply to your contacts. When you are ready click “Add”. Then you can add contact actions. In this case, we are going to add a product tag, so we identify the contact for a product he purchased, in this case, a webinar.
3.- Click “Apply”. Your contact will be created.
Note: You can also add tags to your contacts after they’ve been created, either manually or using automation as we’re going to explain in the next step. To do it manually, you just need to open the contact and look for the tags fields. Then you just have to fill in the tags fields and press “enter” to add them.
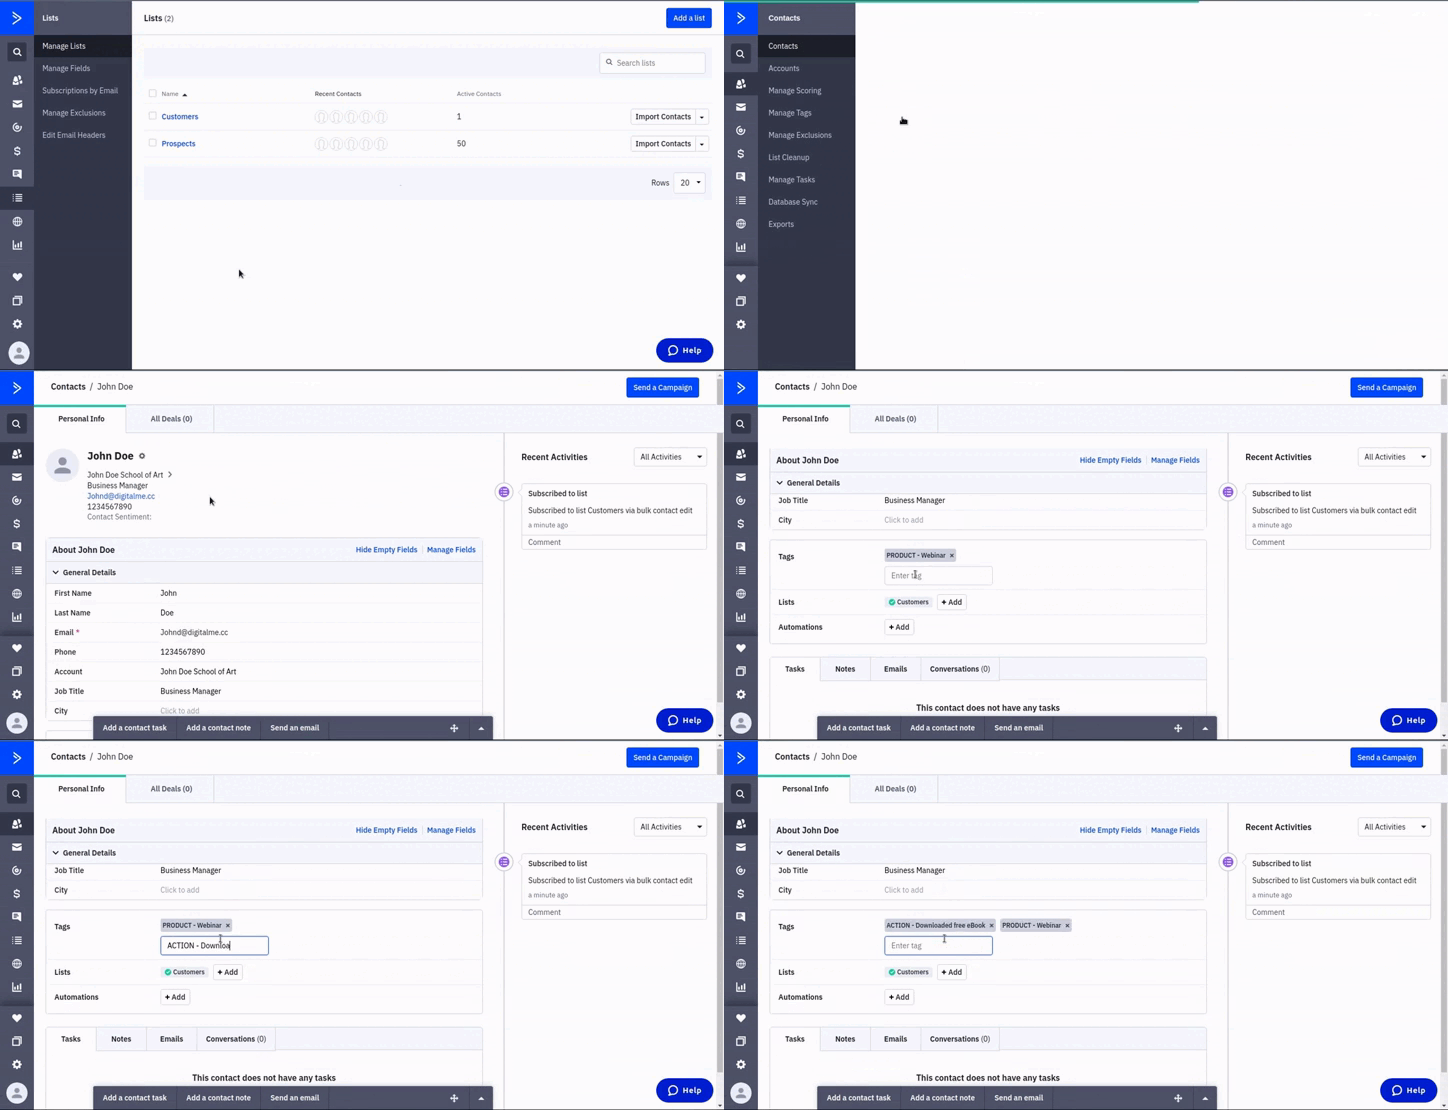
Now, this is how you create lists and give your contacts tags on the go. You can also apply tags to your contacts by using automation, and this is the most efficient way of doing it since you will tell ActiveCampaign to apply tags to contacts based upon triggers and actions.
Add tags by automation
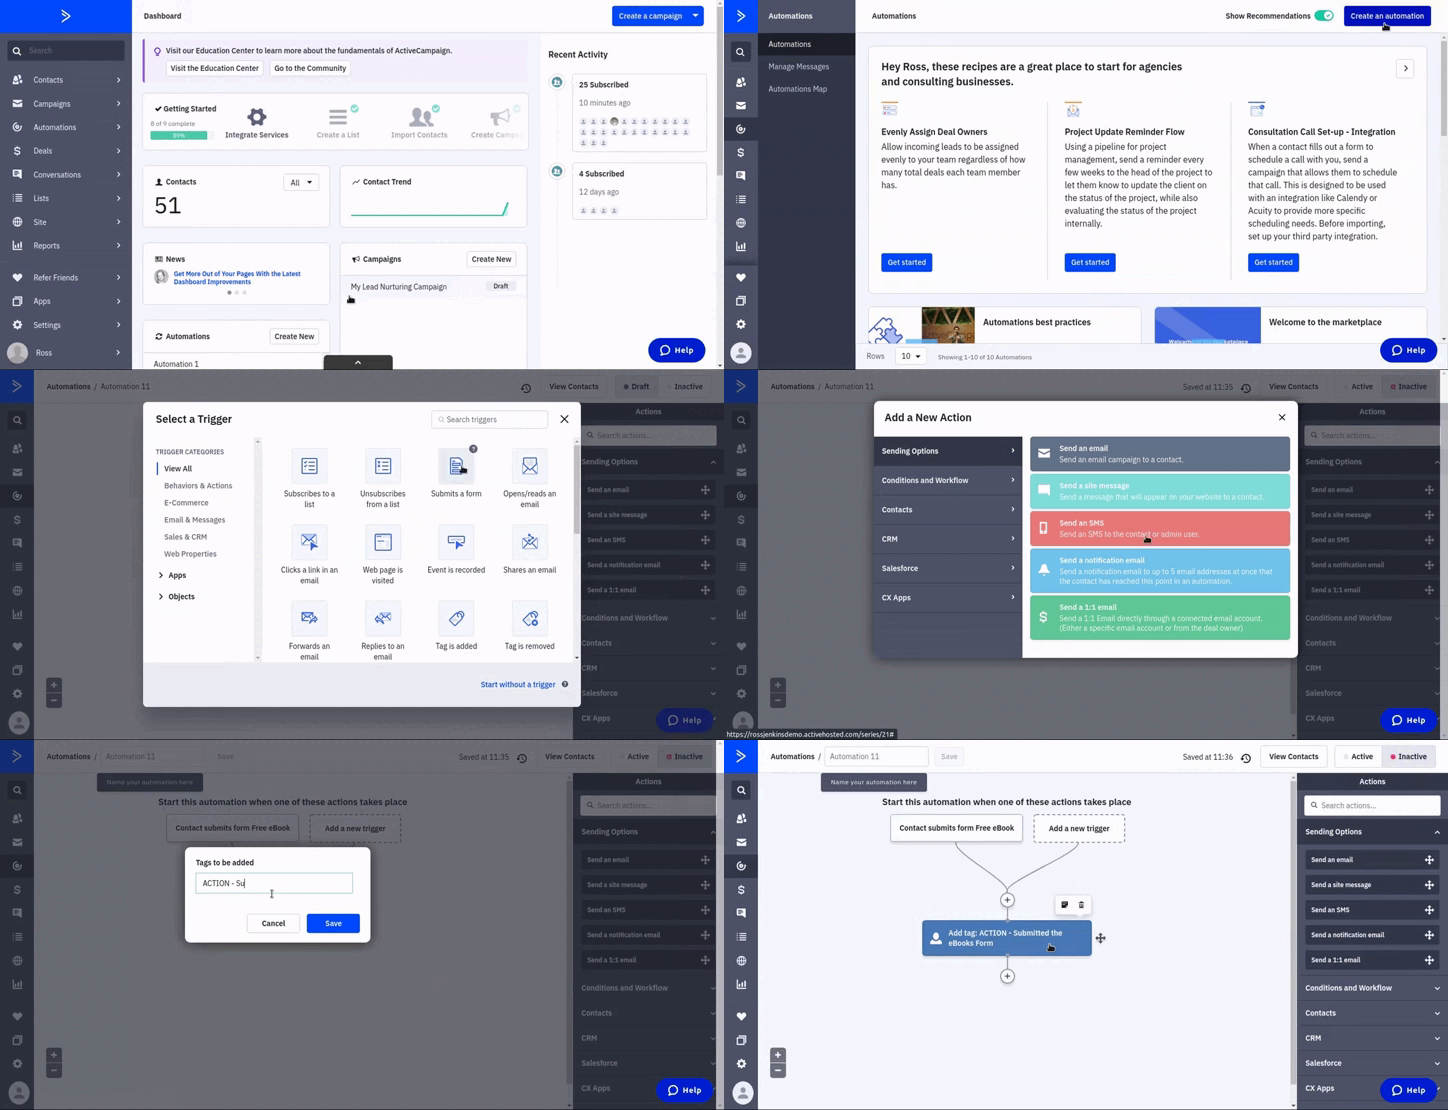
In this example, we want to add a tag for those contacts who have filled out a special form on our website.
1.- To create an automation, click on the “automations” tab in the main dashboard. Click on “Create an automation”.
2.- Select the “Start from Scratch” option to create an automation from the ground up. Click “Continue”.
3.- We’ll select the “Submits a form” trigger. We select our form and how many times we want this trigger to run the automation. We select “once” since it only needs to add the tag the first time the user submits the form.
4.- Click “Add Start”.
5.- Now, we need to add a new action. We look for the contacts type of action and select the “Add a tag” option.
6.- We type in the tags we want to be added to the contacts. Separate the tags by a comma if you need to add multiple ones. Click on “Save”.
This is how you can start adding tags depending on the triggers of your flow. This will start adding the tags automatically. You can also add the “Remove a tag” to delete tags.
That’s it. That’s how easy it is to start adding lists and tags to your contacts list. Remember to keep your list as broadest as possible, and only use tags when those are necessary for your campaigns to be successful. We also can help you with your list and tags here at DigitalME, through our ActiveCampaign managed service. It includes 24/7 Support, fully automated email sequences, customized branded emails, and custom API syncs. Don’t hesitate to contact us if you are interested so we can arrange a call.


 IN VALENCIA AND SAN DIEGO